Basic tool kit for most of our tutorials
The beauty of cardboard crafting is that you don’t need lots of expensive equipment. However, there are a few essentials you can’t do without and for most our craft projects, the following equipment may be all you need: scissors, snap-off knife, metal ruler, cutting mat, compass, pencil, and glue.
When using a snap-off knife
Craft knifes come in many different sizes, shapes and styles. For safety, the type with retractable blade is the best option. When using them, don’t use a plastic ruler to cut against as the edge will soon become damaged and will no longer be strait. Use a steel ruler. For thicker cardboard, it may be necessary to draw the blade across more than once. Always use a cutting mat or any other board that will protect your surface when cutting. Usually cutting mats have a self-healing surface so old cutting lines do not cause any problems. We recommend an A3 size.
Folding with finite precision
Scoring fold lines before you fold cardboard gives a much neater and crisper fold. Use the back of the craft-knife blade. The scored line becomes the inside of your fold. Test folds on a piece of scrap material first if possible, to see how well the techniques work.
Transferring templates
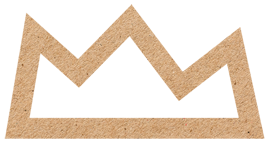
Some projects will require shapes to be transferred. Here is the simplest of methods that doesn’t need any special equipment – except a printer and a piece of standard office paper. Download an attached template and print it. Align it on the card. Puncture all points of the shape with a needle where solid, dashed and dotted lines intersect (using a compass would be more comfortable). Then lift the template and properly connect all the points, using a ruler and pencil, like in a picture shown in a tutorial.
Origami for beginners
Almost any kind of paper is suitable for origami – although some projects work better with thinner paper, others with thicker. Origami paper usually comes in squares, but most other suitable paper comes in rectangular sheets so you will need to cut them down to a square. Origami diagrams show ‘before’ and ‘after’ in sequence, so look ahead to see what the finished fold should look like. Explore the symbols and terms you will encounter in origami diagrams.
Fold towards the arrow:

Fold, crease firmly, then unfold:

Push here:

Turn paper over:

Rotate 90 degrees:

newsletter
[mc4wp_form id=”7656″]
